Make it Different Workshop
Lead by Gerry Kennedy
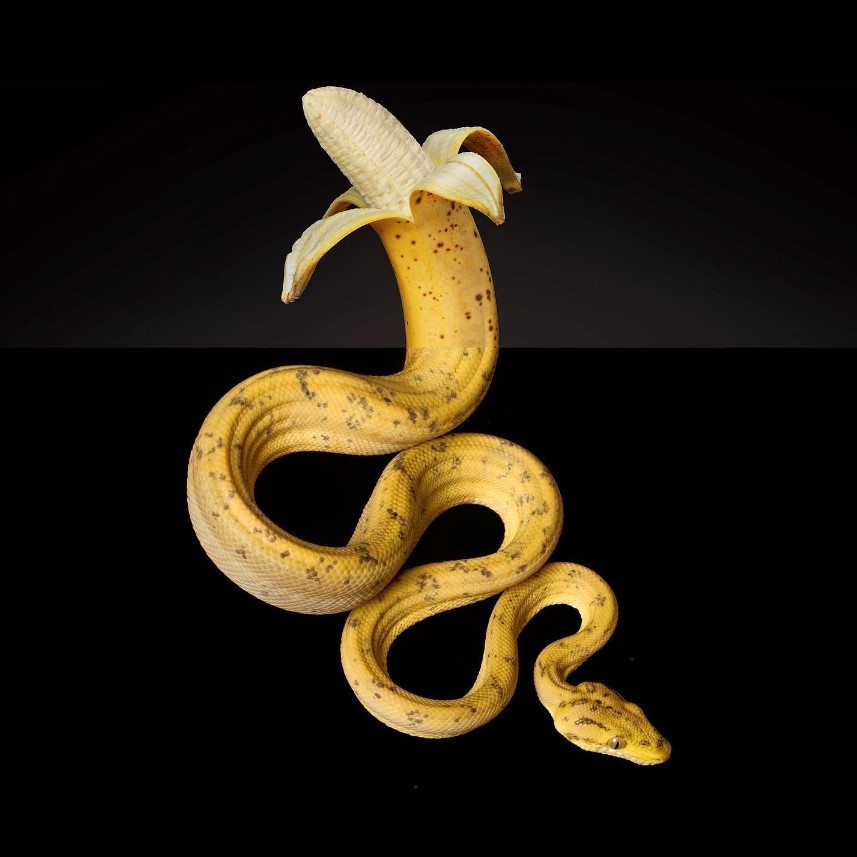
Personal Piece: Mcmennamy inspired f1 lemon
4 min read 28.11.23

I was confused going into this workshop. I had no idea what it meant or what Gerry was going to ask us to do, but that was the entire point of the task. The purpose of making it different was to take 2 randomly selected objects and make something completely new out of them, combine them in a way that somehow made sense, that was the challenge. Gerry randomly selected 2 items per person that they needed to use to create some kind of visual outcome. He showed us the importance of lighting when combining 2 random objects, as putting them in the same setting would create a more seamless effect and save time creating false lighting in Photoshop etc. Another key technique we discussed is perspective. Differing objects in size can be combined is sometimes a comical or unrealistic way to create something that actually works despite being super unrealistic. We discussed the use of sound too, talking over how we could use objects to make sound effects and music. I wasn’t able to do this with my objects because I decided to set one of them on fire… you’ll understand shortly. After showing examples of how we could go about our work, Gerry set us 2 tasks.
To make one random outcome using our objects and one methodical and calculated outcome, something that we knew could work well together.
For my methodical outcome I took inspiration from some of the work Gerry showed us by Stephen Mcmennamy where he takes 2 objects and creates a seamless transition between the two. For my experiment I took a formula 1 helmet and a lemon to combine. The helmet shape reflects that of a lemon and the colours match so I knew I could create an outcome that was both fitting and seamless. I simply imported both images into photoshop, lined the lemon up with the helmet, then used the eraser tool to blend the 2 together. I like the perspective created with the huge lemon leaves on top of the helmet making it look supersized, the hand holding the helmet adds to this comparison I feel. For my random outcome I had been given a christmas decoration and a lighter, probably one of the most random combinations of all. I took the 2 items and did what anybody would do… set them on fire. My plan was to create….

Alignment
Alignment is the key skill used to create this style of imagery. Trying to orientate objects in different ways or positions and changing the size is a great way to come across an interesting idea or outcome. For example this image lines up a fork with the forks on a forklift to create a seemless transition. The transition between components is important because it brings the image together as one despite having contrasting background colours or environments, it is the common factor creating a connection.

Perspective
Another effective technique to achieve these interesting and different outcomes is perspective. Often the assets we have to work with can be massively different in terms of size and sometimes shape, but there is always a common factor. By scaling one object up to match the size of another we can create an image that, in perspective, seems very fitting and actually works. The crazy change in sizing also adds to the image as a comedic effect or feature.

3 point lighting
Gerry showed us the power of the 3 point lighting system for combining objects. Using 3 different types of light (Backlight, Fill light and Key light) you can help to blend almost any objects together. Lighting is like a combining tool, fuzing objects together by placing them in the same environment lighting. When objects have matching highlights and shadows it makes it easier to combine them and manipulate them in different ways while keeping the structure of the image intact.
Featured Artist: Stephen Mcmennamy
Profession: Digital artist and Videographer
Gerry introduced us to Stephens work during his workshop and I was taken back by the creativity of his pieces. He has an eye for spotting patterns and similarities in objects and images, creating sometimes seemless transitions within his work. I like how open he is in his publications, stating he is far from perfect and most of his creations come after hours of failure. (We only see the best bits) This was the main goal for the workshop so I studied his work and read over his captions or documentations of his ideas to help myself understand how he makes his work and how important the process is in designing, especially when creating something completely new with no prior experience or knowledge.