Glitch Workshop
Lead by Gerry Kennedy
Personal Piece: Personal Glitch Prints
6 min read 21.1.123


The next of Gerry’s workshops focused on glitch art. This design technique can be achieved in many ways like editing code, visual manipulation and playing with file overrides. Whichever way you choose to create glitch artwork the outcome is always in the same format, an image distorted and broken apart. He introduced us to the idea of not creating something perfect but something different that stands out, the outcome is about messing things up and failing many times until you get a different outcome that you like. Glitch is certainly a destructive artform, stripping images back instead of building on them. The focus of the workshop was on addressing different methods of glitching something to get certain outcomes. Each method provided a range of differing outcomes, glitching the images in different ways. The 5 key methods Gerry covered were Data Manipulation, Misalignment, Overcompression, Chemical Alterations and Hardware manipulation. You can find out more about these 5 methods below in the [Learnings] section. At the end of the session Gerry gave us a brief which instructed us to make 3 outcomes using glitch methods; 1 piece of artwork and 2 self portraits, 1 still and 1 motion.
My responses for this brief use some of the skills demonstrated by Gerry in his masterclass. For my glitch artwork I used a layering technique which involves taking photos with a common element and aligning that element to create an overlapping and distorted aesthetic around it. I remembered some photography I had saved from a track day near my house with my family. The photos had lots of blur as I couldn’t track them very well but they all had one element in common, my girlfriend stood by the fence. I took 4 images of the blurred cars and layered them on top of each other, using her as a reference point to line up the images. This created a nice composition but I wanted to add more emphasis to the cars flying past and their colours. Messing with layer opacities was not working. My first idea was to venture into the filters tab where I found the glowing edges effect, this was perfect. It really lit up the colours of the cars reflecting their speed as well as creating some nice effects on the overlapping features like the grass and fencing. Overall I was really happy with how this turned out. Evidently like Gerry said, the best outcomes are formed when you randomly mess around with stuff.
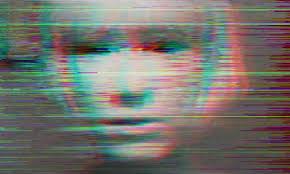
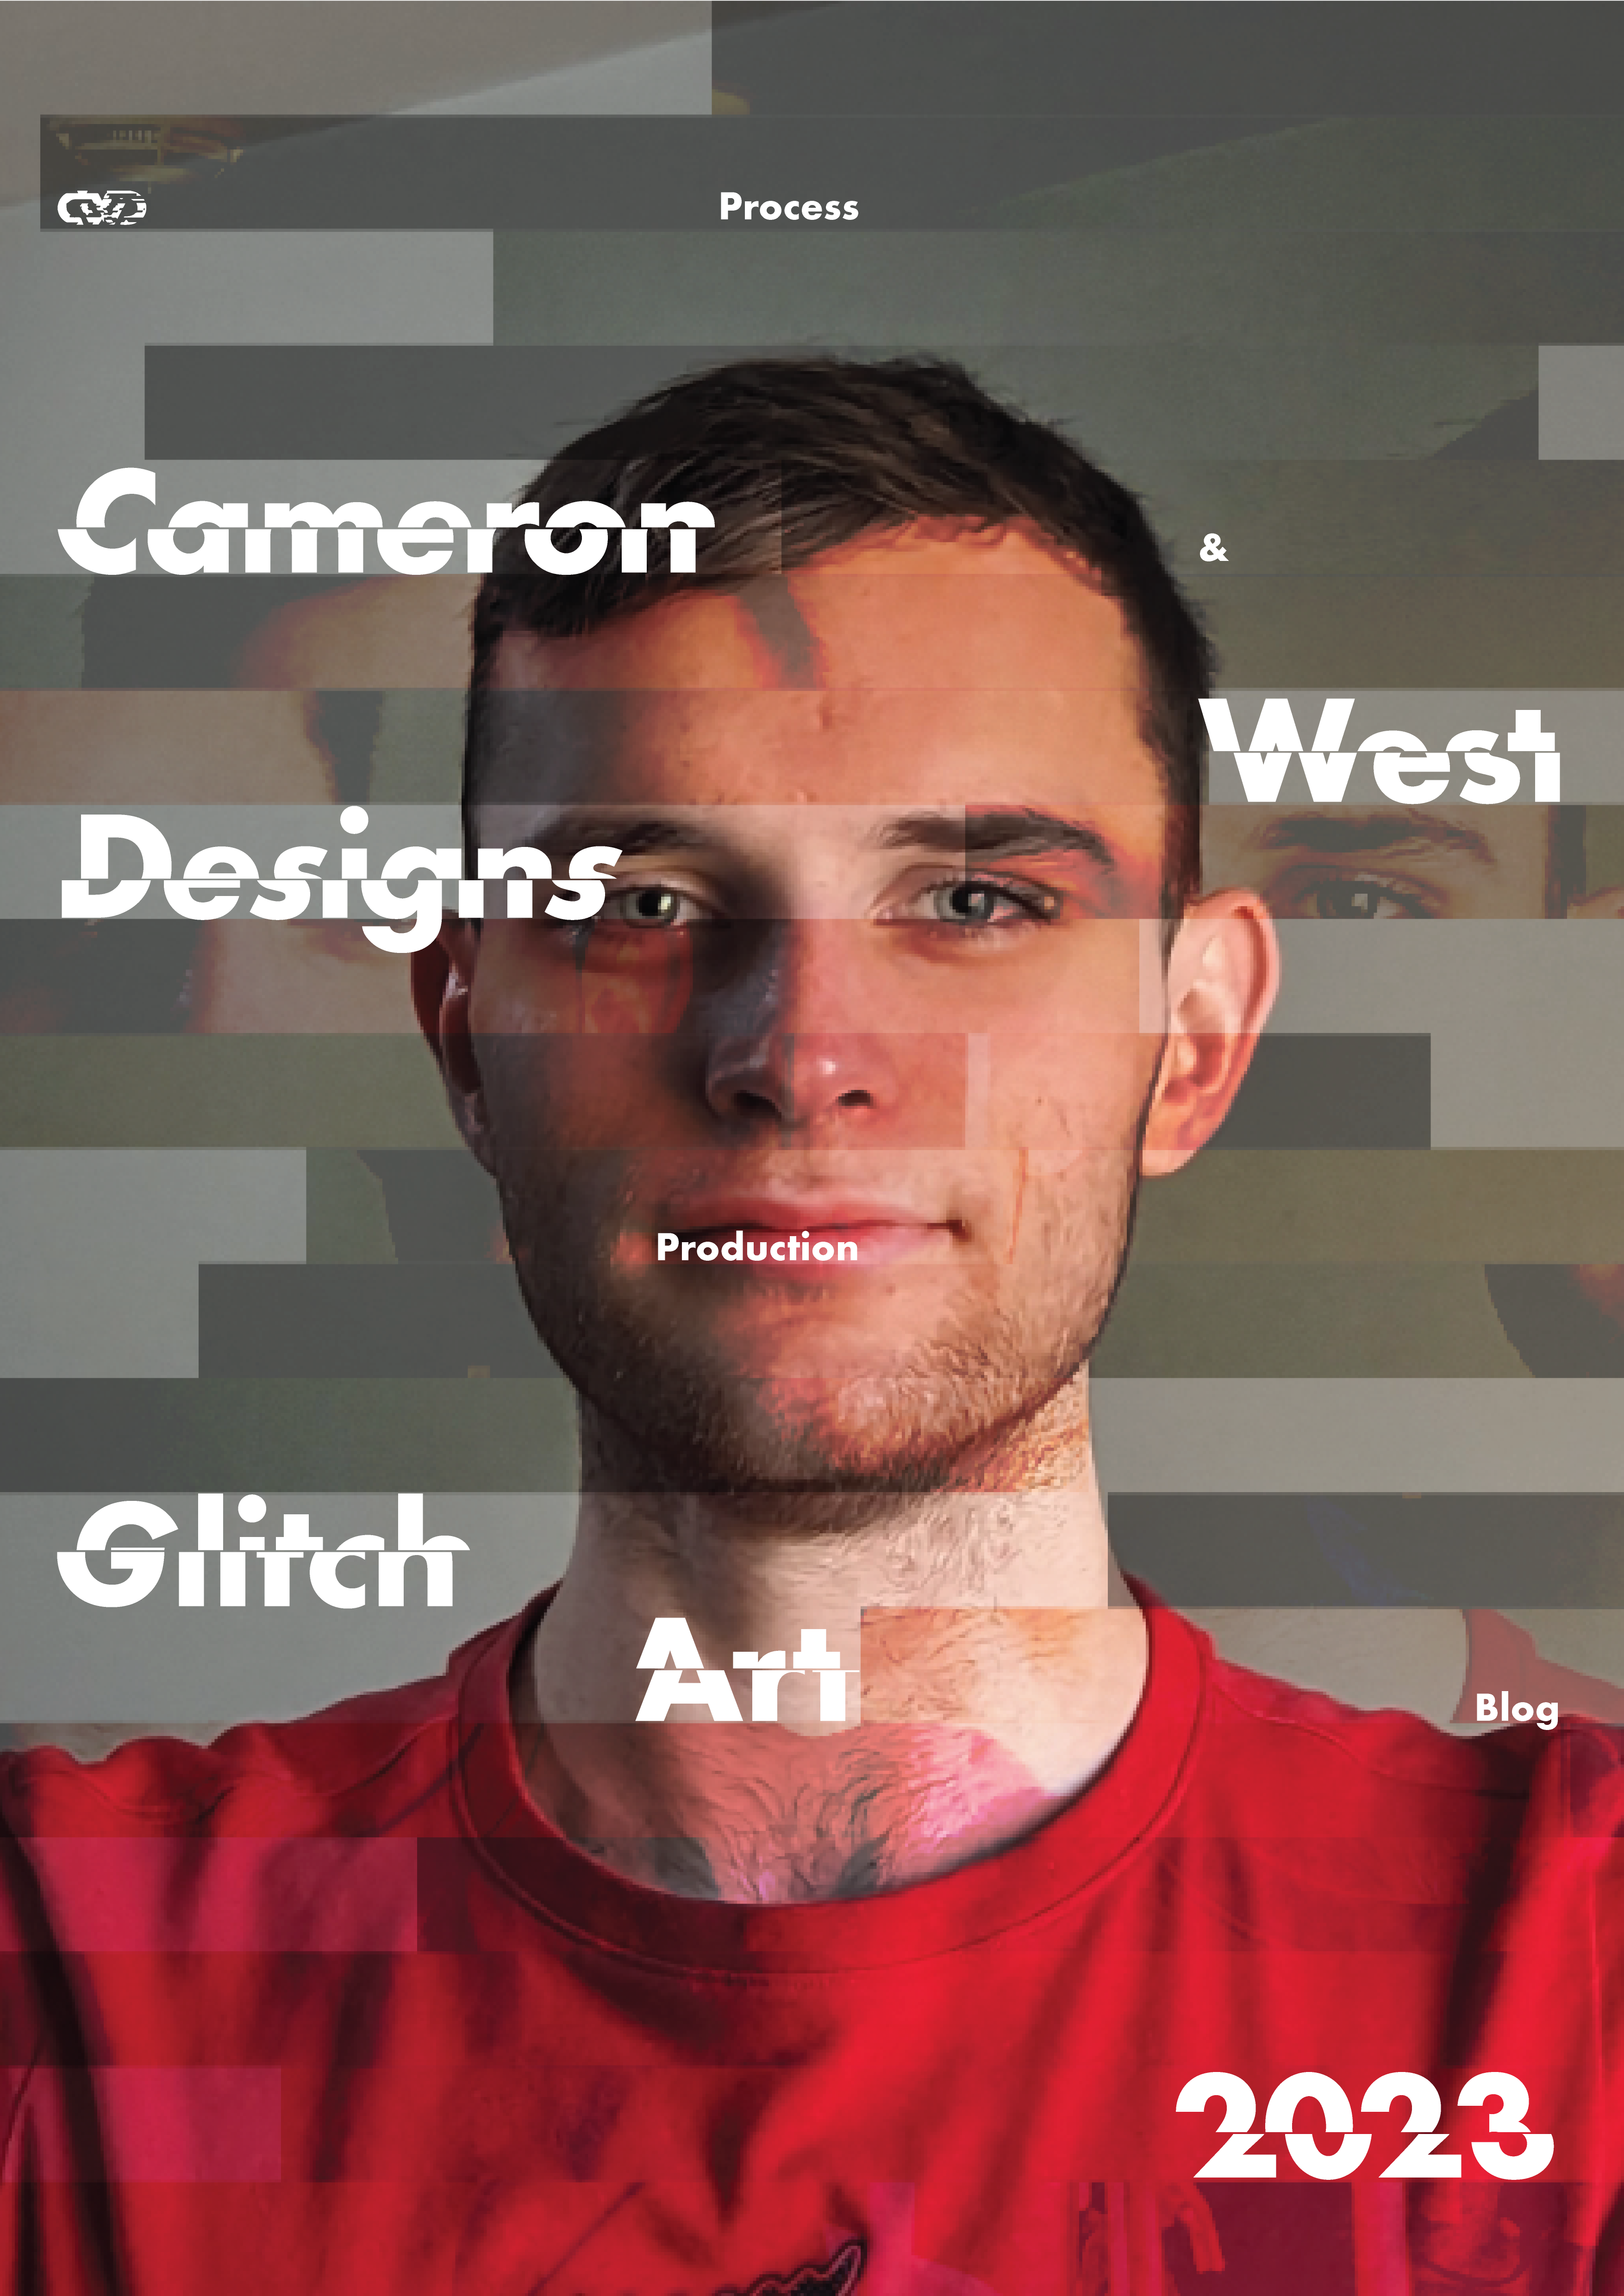
For my 2 portraits I used an online glitch generator to manipulate an image of myself. After messing around with the settings changing things like RBG Shifts, Camera Shakes and other distortions I landed on an animation that reflected a broken tv screen. This was completely unplanned making it the perfect outcome. I liked the aesthetic and accuracy of it in comparison to real tv glitches and looping it over made it a seamless never ending animation. For my still portrait I created a cleaner design in the form of a typographic poster. I used another online glitch generator to make a subtle glitch effect on the image, restructuring my face and altering the colour information. I also applied the same effect to my personal brand logo as I wanted to incorporate that element into the poster. I imported both assets into Illustrator and created typographic elements within the poster using grids. To keep the glitch feel within the poster I chopped up the type and offset it at different points to replicate a glitch effect while keeping legibility. Overall I was happy with the outcome of this experiment and think the outcome makes good use of glitch styling, in a somewhat minimalist way.

Image Compression
One of the methods used to create glitch art involves saving the same work over and over again or running it through a compressor to remove detail from the image. This creates a pixellated image which will eventually become completely white if you save over it enough. As a technique this method can be used to create distortions and blurred aesthetics for artwork, depending on how many times you run it through a compressor.

Chemical Alterations
This technique is popular with polaroid cameras when developing the images. It involves bursting the chemical packs used to develop the image in order to create imperfections once the photo has developed. The image can be manually distorted by smudging it before it dries out or over exposing it to light in specific areas. This technique is purely physical but can be replicated in programmes like Photoshop.

Misalignment
Misalignment is simply not aligning prints intentionally to create an offset effect. The easiest way to create this effect is through riso printing, altering the settings of the printer to offset the design when printed in different colours. some misalignments use many different designs or images with 1 common feature which they line up to create a focal point surrounded by inconsistencies.

Editing code
This is the oldest method of creating glitch art. Many online programmes are available that can take your image and let you manipulate and delete areas of code. The process is completely experimental as you have to delete random areas and see what happens, giving you no control over the outcome (Unless you can read code). Once glitched the image cannot be reverted so saving different copies of the original is important.

Featured Artist: Rosa Menkman
Profession: Glitch Artist/Designer
I came across Rosa's work when looking for inspiration for my own portrait glitch work. I came across her style of work which manipulates dummy style figures using glitch to create a sci-fi aesthetic. I like her work because it provokes thoughts about what is going on, for example the purpose of the glitch and the meaning of the figure behind it, is it AI? The broken TV aesthetic is a really effective technique that she used and it inspired me to create my own using a similar style.