After Effects Workshop
Lead by Stephen Hibbert
Personal Piece: Mercedes F1 animation
4 min read 06.01.24
Stephen’s second workshop runs through the usage of type in after effects. We had already received previous experience from industry experts in how to use the software, but Stephens workshops focused on type application and focusing our earnings into developing a professional looking outcome for an interest of our choice. He first recapped some of the basics of animating in after effects like importing footage and setting up a composition for industry standard exports/formats. He then dived into exploring type with us, showing some use cases and how to manipulate its properties to fit our composition style, therefore creating a unique aesthetic before beginning to input any form of animation. The next step was adding track mattes to the type layers, allowing us to overlay masks, shapes and images onto the type giving it a feel similar to some of the examples Stephen showed us in the beginning of the workshop.This set us up perfectly to animate the scene adding in smooth fade effects for the type, adjusting the timing to fit our composition speed. To finish up Stephen showed us how to add a light leak into our composition for added effect, this was completely optional but a nice clean effect to use, especially when animating over different letterforms. He demonstrated how the effects can add drama to the scene as well as highlight specific areas of type, drawing our eyes in certain directions and bringing a sense of guidance and control into the scene. Overall this was a great workshop for applying set skills in after effects, as well
as understanding how to use type in motion graphics and accompanying it with appropriate effects and transitions. For my personal exploration after this workshop I decided to create some motion graphics for Mercedes F1 Team after getting inspired by one of their short animations posted to their social media. The animation used the teams unique typefaces to create a ‘lights out’ animation for the beginning of the race. I had also viewed their social media graphics for race results which gave me the idea to fuse the two graphics together to create a modular system which reflected the results from each event, with a title sequence and starting grid animation using the grid slots to reflect where the drivers placed within the session, as well as provide an eye catching animation to gain attention from their large audience. I create rows of type in an alternating motion pattern from left to right, combined with some smooth easing of larger title text to create appealing and eye catching introductions, followed closely by an animation of the grid lineup using smooth easing and masks to reveal the text behind each grid position. To finish I created a loop for the animation, making it appropriate for social media distribution and creating an addictive/repetitive cycle for the viewer. My personal explorations here feature a more logical and practical approach, in comparison to Stephen's workshop which covered a more artistic and emotional experience with type, like telling a story with motion.
Importing Media
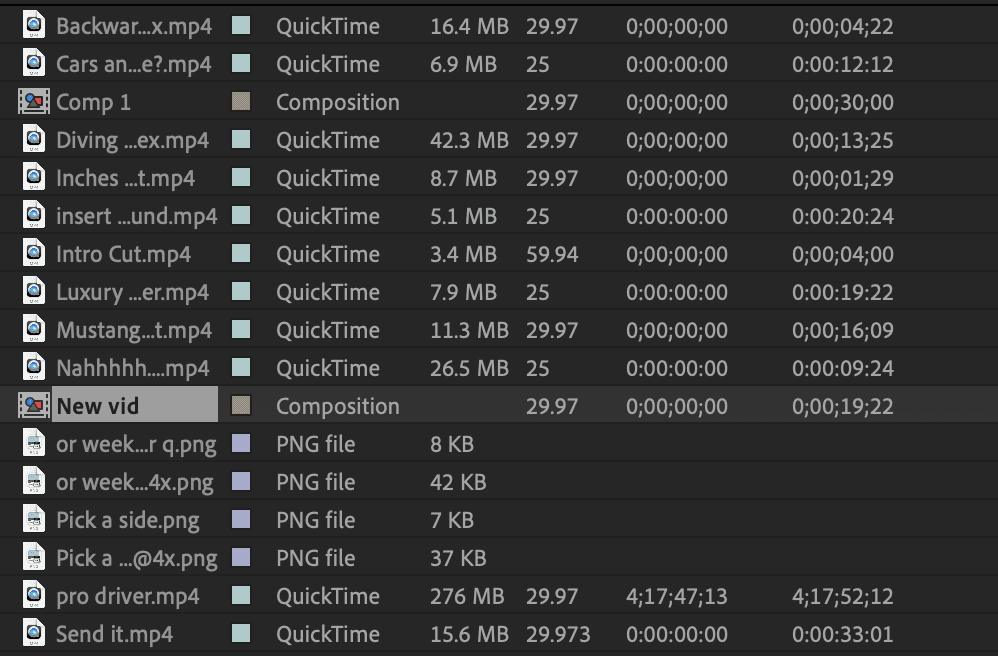
The first thing Stephen showed us was how to import our assets into the composition. This has to be carried out in a specific way in order to make sure the files are all in the same composition, and the correct file formats to use within after affects. We can drag all of our footage in at once and then import it into the correct composition as seen on the left.

Creating Type layers
Next we created type layers to bring into our scene. The after effects type tool was hard to work with so I created some type arrangements in illustrator, ready to import into after effects as high resolution PNGs. I made sure to make the type big so it would take up more space on the screen when track matting footage over the top of it.
Track Matting
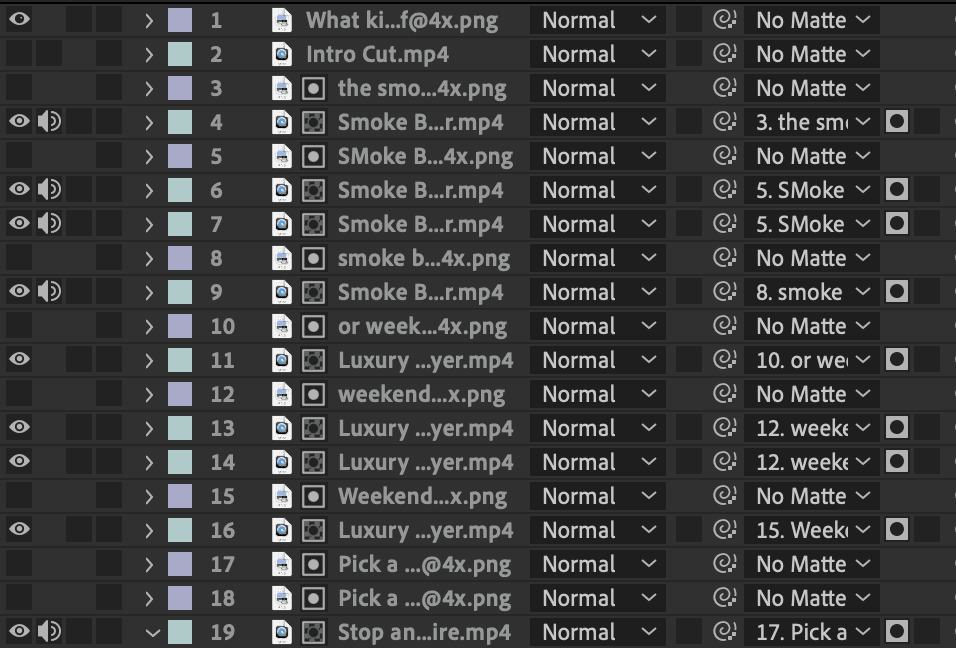
Track matting is a way of masking different layers in after effects, similar to how photoshop and Illustrator work, but using footage as well as still images. To create a track matte I selected the text layer and selected the matter layer as the imported footage for each scene, creating an overlay of the text on the image, like a mask.

Sound
To add some contrast to my piece I muted the footage for one half and turned up the Db for the other half of my scenes. This created sharp cuts between loud and peaceful scenes, adding a nice effect to the composition. The cuts were made by using the timeline and aligning the footage and track matted layers with each other to create instant transitions. Sound engineering is a whole new world in motion design and something I will need to develop stronger skills in over time.

Exporting
Export settings vary massively in after effects depending on what kind of video you are exporting and what devices it will be viewed on. After effects has several options for exports on Iphone, youtube, television and other bespoke video formats to cater to many different industries. You can adjust the frame rate and the file type to match the quality of your video, ensuring the export is of high quality and appropriate resolution for the use case it is needed for.

Featured Artist: Valth Visuals
Profession: Logo animator and motion designer
Valth is a motion designer I have been following for some time. He creates really smooth and cohesive explainer videos and logo animations for companies with in depth services and products. I love the way he can use motion to tell a compelling story as well as catch eyes when it comes to targeting audiences and keeping them engaged with a product. The logo animation for the French Open that he make is one of my favorites. His work is a great example for the capabilities of motion design and a way of seeing what good motion entales.


