Cinema 4D Workshop
Lead by Stephen Hibbert
Personal Piece: Abstract Animation
5 min read 20.02.24
Stephen introduced us to the world of 3D design with his Cinema 4D workshop. It is a very complicated programme and the world of 3D has always appeared like some impossible wizardry, but Steven made it clear and easy to implement by outlining the basics and reminding us that not every tool needs using. He began by showing us some developments from previous students, outlining the capabilities of the software and opening our eyes to how we could leverage it in our own work and throughout his workshop. He gave us some useful resources to reference before bringing us into the programme to learn the basics. We started out by understanding the different views in the software; 3d, editor view and the different camera positions that allowed us to view our compositions from multiple angles. This was the basic navigation for the software, letting us move around our scene with full control. Next he introduced us to the data entry fields, which are the key to creating and modifying structured within a scene. You can edit options like object size, corner curvature, pitch, orientation and insert new shapes, as well as control and implement lighting fixtures, typography and grids. The data entry fields control the majority of the inputs for the designs, while the other options allow for modifications of existing elements within the design. After experimenting with all of the different inputs and creating a scene, Stephen
introduced us to the timeline and keyframing for animating our scenes. The system works similarly to premiere pro and after effects in the adobe suite, using a timeline layout with keyframes to create movement within the scene, animating individual objects as well as lighting movement to create cinematic pieces. We experimented with the different variables, rotating and moving objects within the scene and easing the transitions to create a smooth motion. The final stages in the project involved looking at texturing the objects, this is a complicated feature for implementing realistic and high quality textures as it requires a lot of tweaking to get the perfect level of realism. There are also assets that are preset and can be downloaded to apply to designs, but here our focus was on exploring the menus and experimenting with the settings available. To wrap up the workshop we exported out work, which took some time, rendering out the textured and creating an MP4 for the animations we introduced. For my personal exploration of 3D design I decided to create a short abstract animation using the skills I learnt from the workshop. I positioned multiple shapes around each other and used the material manager to create some basic materials, purely to practise and build on my learnings from the workshop. I then added some animations to the shapes to create a void like spinning rotation.
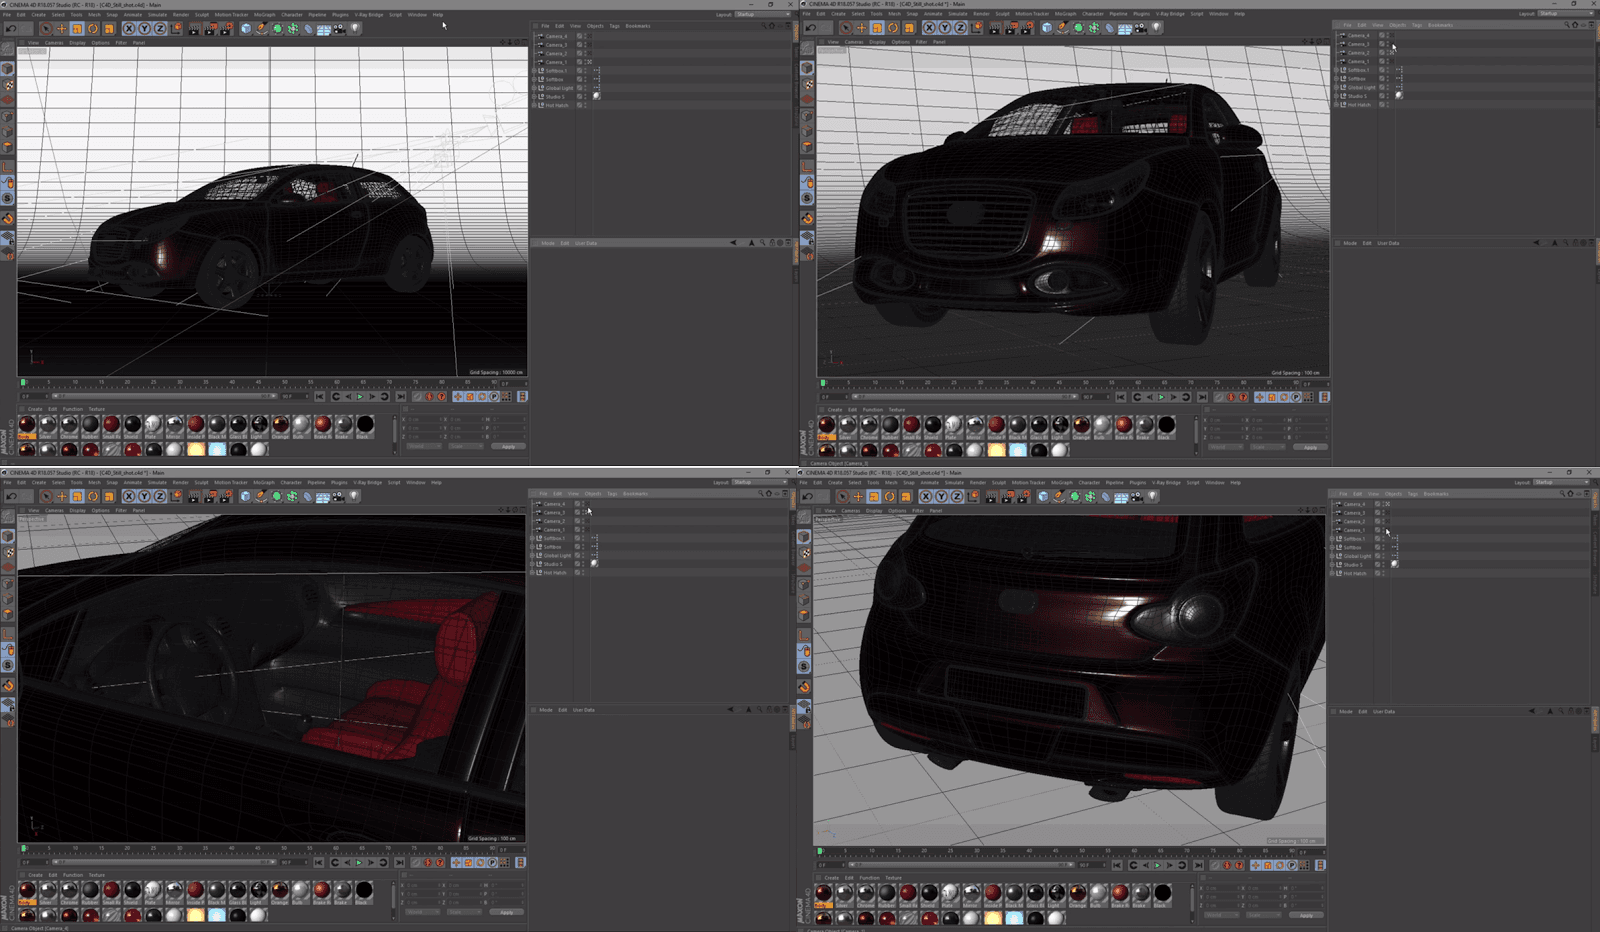
Camera Views
Camera views are the base for viewing your projects from different angles. Using multiple angles at once lets you get a good idea of how the lighting effects your projects, allowing you to make changes in real time and see the impact from different angles. In addition you can use fixed cameras or motion cameras to capture and export your designs from different angles, making it perfect for product photos, showcases and advertisement creation.

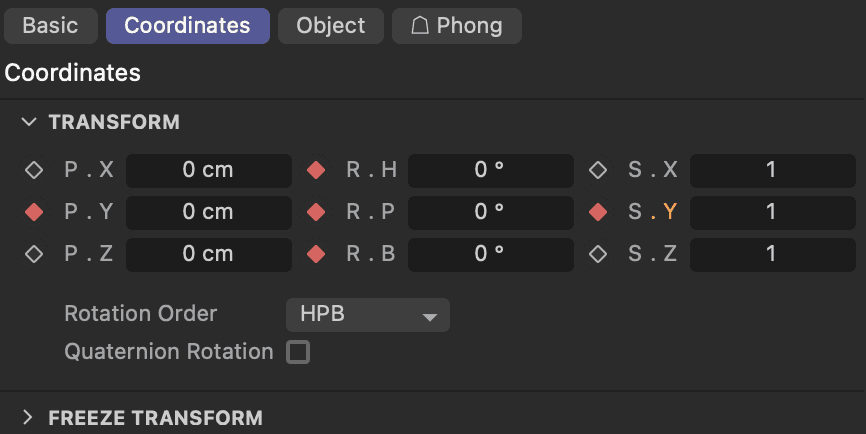
Data Input Fields
Data input fields are the primary location for alterations within your design. Steven showed us the different tabs for all kinds of adjustments like materials, positioning and colour. We spend the majority of our workshop getting to grips with this panel as it lays the foundations for all adjustments in the programme, giving us full control over our projects.
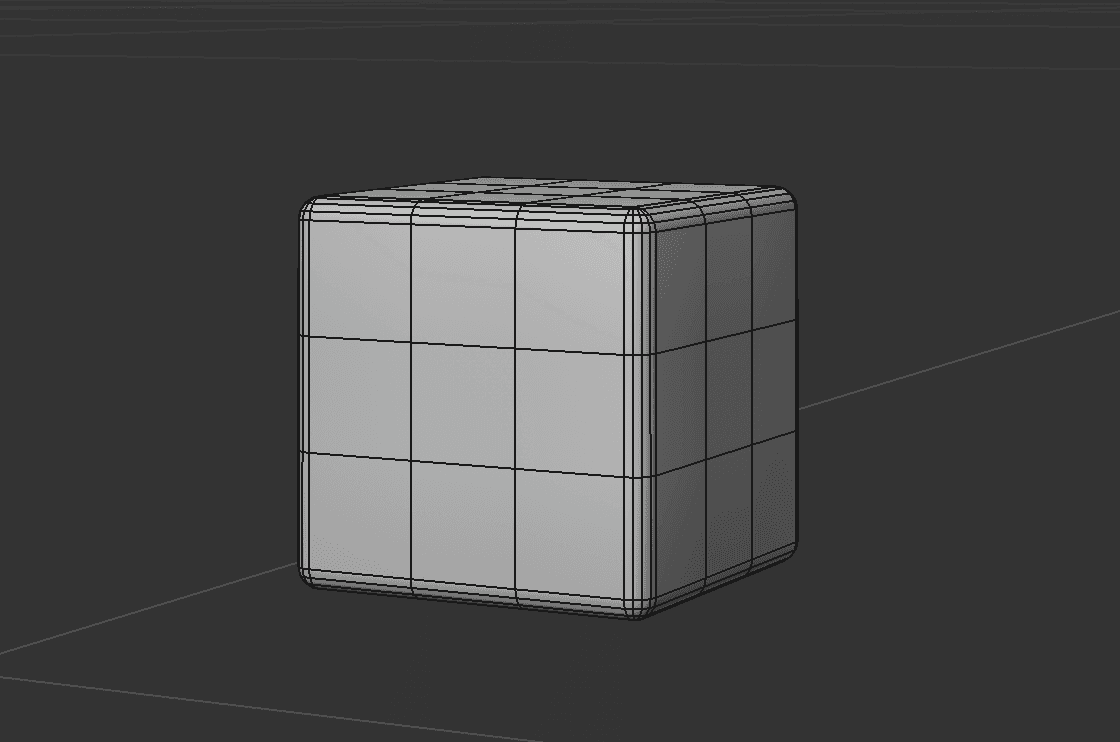
Scene Creation
The spot healing tool is an advanced and more accurate version of the clone stamp tool, using content aware features to create seemless adjustments to objects. It is perfect for touching up images with things like scratched surfaces, spots and other small imperfections you may have with your images. It is not as effective on bigger imperfections as it can't gather enough surrounding information to create a clean touch up, the content aware fill feature is best for this.
Keyframing
Similar to programmes like premier pro and after effects, C4D supports key framing to make animations within projects. Steven showed us how to use the key framing panel and the data fields to make adjustments and movements within our designs. The potential for animation is high, especially when combined with cinematic camera positions to create immersive videos and motion.
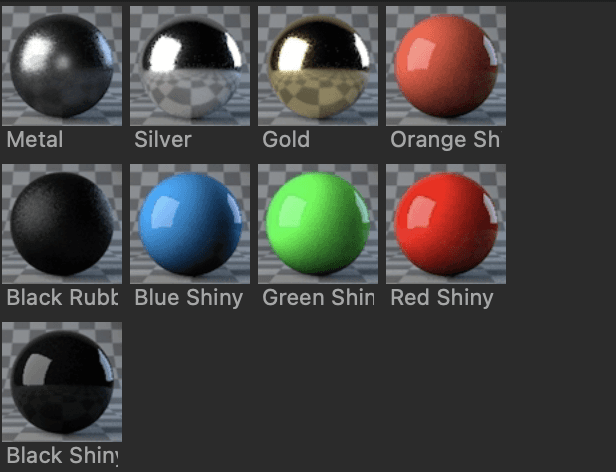
Texturing
This is the most fun part of the C4D experience, its ability to create a range of realistic looking materials with shadows, reflections and accurate properties is incredible. We experimented with making our own textures as well as importing some from online websites which had been pre-constructed for us to drag and drop onto our designs.

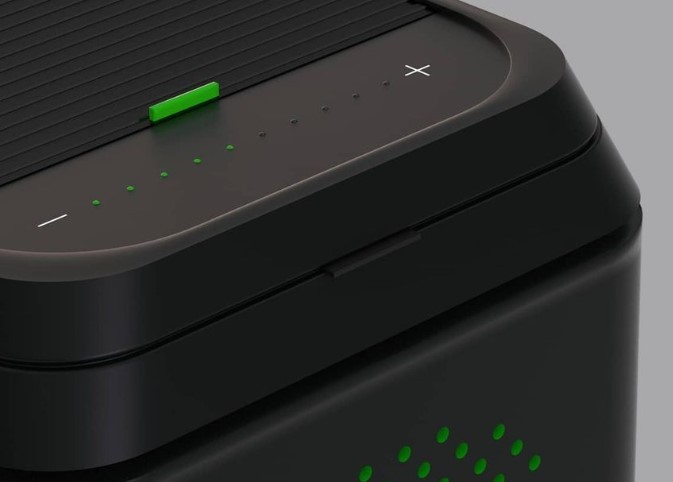
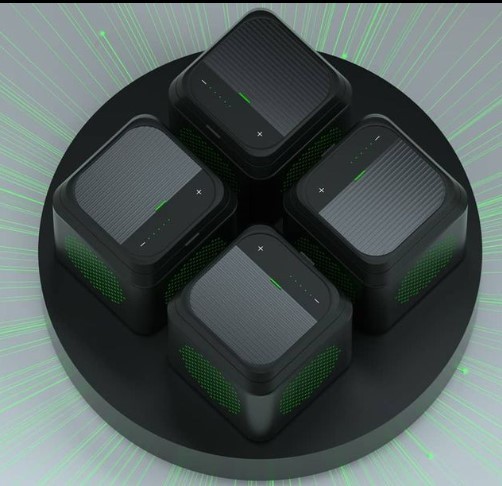
Featured Artist: Owais Jarvid
Profession: Art Director and 3D Expert
When looking for some inspiration for my own explorations I came across Owais and his product design work. I love the modern and minimal style he uses and the presentation of his work is really clean. He models everything in C4D and uses a range of camera angles and lighting setups to present his work and really sell his ideas. On top of this he creates abstract letter forms and scenes similar to what my exploration involved as I drew inspiration from those pieces.